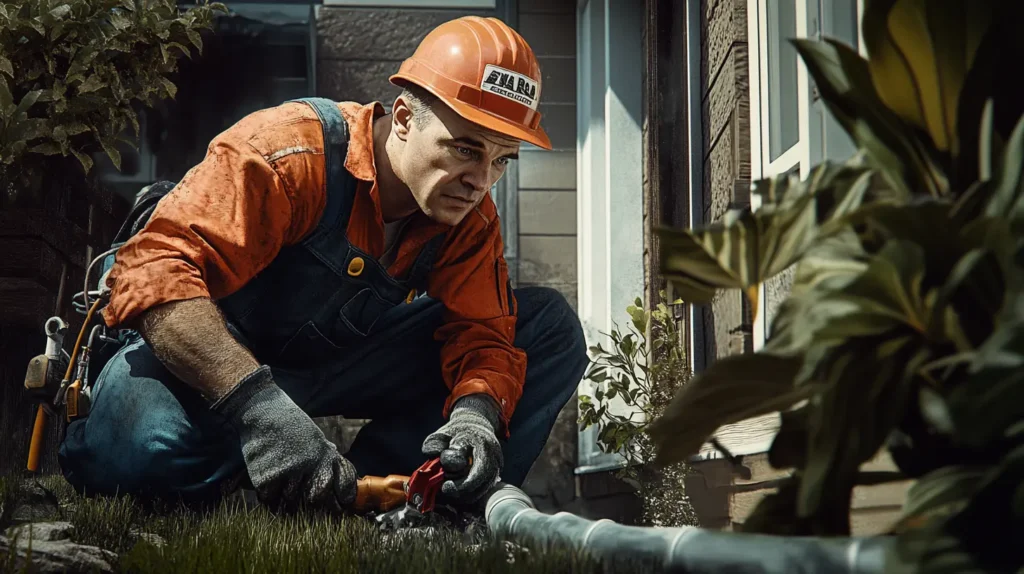
Whether you’re dealing with a burst pipe in an apartment bathroom or an outdoor line that’s given way, acting fast can save you thousands of dollars in damage. At Kingdom Based Plumbing, we know burst pipes can strike at the worst times, and this guide will arm you with actionable steps to minimize chaos, protect your home, and call in the right help when you need it most.
Let’s dive into how you can handle a burst pipe, step-by-step.
1. Turn Off the Water Supply Immediately
When a pipe bursts, time is your worst enemy. A ruptured pipe can release water at an alarming rate—up to 10 gallons per minute, depending on the severity of the break and your home’s water pressure. Every second counts as water seeps into floors, walls, and belongings, causing structural damage, fostering mold growth, and racking up repair costs. Stopping the water flow immediately is the single most effective way to limit the chaos.
Locating Your Main Water Shut-Off Valve
Your home’s main water shut-off valve is the key to controlling a plumbing emergency. If you’re like most homeowners, you may not think about this valve until disaster strikes, but knowing its exact location in advance can save you valuable time.
Here’s where to look:
- Inside Your Home: Check under the kitchen sink, in the laundry room, basement, or near the water heater. In many modern homes, it’s located on an interior wall close to where the water line enters the house.
- In the Garage: For homes without basements, the valve may be inside the garage, typically along an exterior wall.
- Outside Your Home: If you can’t locate the valve indoors, head outside. The main shut-off valve is often positioned near the water meter, which is usually housed in a box close to the curb or along the property line.
In some cases, particularly in older homes or apartments, the shut-off valve might be in an obscure location or shared with other units. If you live in an apartment, contact your building manager immediately so they can shut off the water supply for your unit or the affected area.
How to Shut Off the Valve
Once you locate the valve, here’s how to turn it off:
- For Wheel-Style Valves: Turn the valve clockwise (to the right) until it stops. This cuts off the water supply.
- For Lever-Style Valves: Rotate the lever so it’s perpendicular to the pipe. A lever parallel to the pipe indicates the water is on, while a perpendicular position means it’s off.
If your valve is stuck or hard to turn, avoid forcing it, as this can cause further damage. Instead, use a wrench for extra leverage or call a professional plumber to assist.
What If You Can’t Find or Turn Off the Valve?
Sometimes, you may not be able to locate the valve quickly—especially during a high-stress emergency. If you’re unable to shut off the water:
- Call a plumber immediately for emergency service. At Kingdom Based Plumbing, we’re available 24/7 to assist you during urgent situations.
- Turn off individual fixtures as a stopgap measure. Locate valves under sinks, toilets, or appliances (like your washing machine) and turn them off to minimize water flow.
Why Preparation Is Key
The truth is, the time to locate your shut-off valve is before an emergency happens. Waiting until water is pooling at your feet isn’t ideal. Spend 5 minutes today to:
- Find your main shut-off valve and label it clearly for everyone in your household.
- Make sure you have a wrench or valve key handy if the valve is stiff.
- Share this knowledge with your family members or roommates. In an emergency, anyone in the home should be able to act quickly.
Pro Tip: Create a simple emergency checklist that includes the shut-off valve location and post it somewhere visible, like on the fridge. This small step can save you precious seconds during a crisis.
2. Drain the Remaining Water
Shutting off the main water supply is a critical first step in handling a burst pipe, but the job isn’t done yet. Even with the water valve closed, there’s still water trapped inside your pipes. If left unaddressed, this residual water can continue to leak from the burst section, cause additional damage, and create lingering pressure within the system. Draining the pipes completely is essential to prevent further water from escaping and to minimize the impact of the leak.
By taking a few additional steps to empty the water lines, you’re essentially resetting the plumbing system and ensuring that no more water trickles into the damaged pipe. This step is particularly crucial if the burst occurred in a significant section of the piping or in an area where quick access for repairs is required.
How to Drain the Pipes Effectively
Follow these steps carefully to flush out all remaining water:
- Start with Cold Water Taps
Begin by turning on every cold water tap in your home. Work your way systematically from one end of the house to the other, including:- Kitchen and bathroom sinks
- Bathtubs and shower fixtures
- Outdoor spigots or garden hoses
- Turn Off the Water Heater
After addressing the cold water lines, it’s time to focus on the hot water system. Before opening hot water taps, ensure you turn off your water heater. Leaving the water heater running while it’s drained can damage the heating element or cause the system to overheat, as no water will be left to circulate.- If you have a gas water heater, turn the thermostat to the “pilot” setting.
- For electric water heaters, switch it off at the circuit breaker to cut power safely.
- Open All Hot Water Taps
Once the water heater is turned off, go through the house again and turn on every hot water tap—kitchen, bathrooms, and utility sinks. Just like with the cold water taps, allow them to run until water stops flowing completely.This ensures that all hot water is drained from the pipes, reducing pressure and preventing any water left in the system from leaking out of the burst section. - Flush the Toilets
Don’t forget about the toilets. Toilets hold a surprising amount of water in their tanks and bowls, which can add to the overall cleanup if not drained.- Flush each toilet repeatedly until there’s no water left in the tank or bowl.
- If the tank doesn’t refill because the main supply is shut off, use a towel or sponge to soak up any remaining water.
- Drain Outdoor Water Lines
If the burst pipe is connected to an outdoor spigot or irrigation system, open any exterior valves to let trapped water escape. For homes with hose bibs or outdoor faucets, don’t forget to disconnect garden hoses, as trapped water can expand and cause additional issues, particularly during colder weather.
Why Draining the Pipes Matters
Draining the water system is a necessary safeguard for two reasons:
- Reduces Pressure: Even after turning off the water supply, trapped water can keep applying pressure to the damaged pipe. Draining the system eliminates that pressure and prevents the leak from worsening.
- Prepares for Repairs: A dry system allows plumbers to assess and repair the damaged pipe more efficiently. Attempting repairs while water remains in the lines can cause messier leaks and increase repair time.
Additionally, for homes prone to freezing temperatures, fully draining the pipes can prevent residual water from freezing, expanding, and worsening the existing damage.
What to Avoid While Draining Water
While draining the pipes is straightforward, here are a few mistakes to avoid:
Rushing the Process: Allow the water to drain completely. Partial drainage can leave water in problem areas.time and stops water from spraying uncontrollably if the pipe continues to split.
Leaving the Water Heater On: This can cause damage to the heater elements. Always turn it off before draining the hot water system.
Ignoring Toilets and Outdoor Fixtures: Overlooking these areas leaves water trapped in the system, which can still leak or cause further issues.3. Locate the Burst Pipe and Assess the Damage
Once you’ve successfully stopped the immediate flooding by shutting off the main water supply and draining the system, it’s time to locate the burst pipe and assess the extent of the damage. This step is crucial, as identifying the source of the leak helps determine the type of repair needed and ensures no underlying problems are overlooked.
How to Locate the Burst Pipe
Finding a burst pipe may be straightforward in some cases, such as when water is visibly spraying from an exposed pipe or pooling under a sink. However, pipes often burst in hidden or hard-to-reach areas, making it essential to carefully inspect your home for any signs of damage.
Here’s where to look and what to watch for:
- Ceilings and Walls
- Look for water stains, discoloration, or sagging sections on ceilings and walls, particularly if the burst pipe is located in an attic, upper floor, or behind drywall.
- Bulging or bubbling paint and wallpaper are strong indicators that water is trapped behind the wall.
- Under Sinks and Cabinets
- Check for puddles of water or damp spots beneath kitchen and bathroom sinks, as pipes in these areas are prone to bursting due to blockages or corrosion.
- Don’t forget to look inside cabinets for moisture, mold, or musty odors.
- Bathrooms and Utility Rooms
- A burst pipe in an apartment bathroom or utility room can cause standing water around toilets, bathtubs, washing machines, and water heaters.
- Check grout lines, tile edges, and floor corners for signs of water seepage.
- Floors and Baseboards
- Warping, buckling, or discoloration on wooden floors or laminate often points to water damage beneath the surface.
- Wet baseboards and damp carpet edges indicate a possible hidden burst pipe running behind walls or under the floor.
- Unusual Sounds
- Listen carefully for hissing, dripping, or spraying sounds. These noises can help pinpoint the exact location of a burst pipe, even if it’s hidden.
If you’re unable to find the source of the leak, the pipe may be located inside walls, under the foundation, or in another concealed space. In these cases, it’s best to call a professional plumber who can use specialized tools, like moisture detectors or plumbing cameras, to locate the damage without unnecessary demolition.
Assessing the Damage
Once the burst pipe is located, assess the extent of the damage:
- Visible Breaks and Cracks: If the pipe is exposed, note the size and length of the crack. Minor hairline fractures may allow small leaks, while larger breaks can release substantial amounts of water.
- Hidden Damage: If the burst pipe is behind drywall or under flooring, consider the extent of water infiltration. Look for:
- Mold growth or musty smells.
- Damp, softened drywall or flooring materials.
- Warped wood, rotting supports, or compromised insulation.
- Secondary Damage: Burst pipes often cause additional problems like:
- Structural damage to ceilings, walls, and floors.
- Electrical hazards if water comes into contact with wiring or outlets.
- Mold growth in damp, poorly ventilated areas.
Documenting the damage with photos or videos is important, especially if you plan to file an insurance claim.
Common Causes of Pipe Bursting in Northeast Florida
Understanding what causes pipes to burst can help prevent similar issues in the future. Here are the most common culprits:
Aging Pipes
Older homes, particularly those in historic neighborhoods around Jacksonville or St. Augustine, often have aging plumbing systems. Pipes that are decades old become more prone to leaks and bursts due to wear and tear over time.
Cold Snaps
While Northeast Florida enjoys warm weather most of the year, occasional cold snaps can catch homeowners off guard. When temperatures drop suddenly, any exposed pipes are at risk of freezing. As water freezes, it expands, putting pressure on the pipe walls until they rupture.
Corrosion
Over time, pipes—especially copper and older galvanized pipes—can corrode and weaken. Corrosion is more common in homes with hard water, as minerals build up and wear down the pipe material. Once a pipe becomes thin or brittle, it’s far more likely to burst under pressure.
High Water Pressure
High water pressure may seem harmless, but it’s a silent threat to your plumbing system. Pipes are designed to handle water pressure within a specific range (typically 40–70 psi). If the pressure consistently exceeds 70 psi, the pipes can crack or burst. Installing a pressure regulator can help mitigate this risk.
Clogs and Blockages
A blockage in a pipe—whether due to grease buildup, debris, or mineral deposits—can cause water pressure to spike. This is especially common in smaller pipes, where restricted water flow causes stress on the system.
4. Temporarily Patch the Pipe (If Possible)
If you’ve found the break and need a quick fix to stop the leaking, here’s what you can do until a professional plumber arrives:
DIY Quick Fixes for Burst Pipes:
- Pipe Tape: Wrap waterproof pipe repair tape tightly around the crack.
- Pipe Clamps: Use a rubber patch (like a section of an old garden hose) and secure it over the break with hose clamps or zip ties.
- Epoxy Putty: For small leaks, mold epoxy putty around the break. Let it set for a few minutes to stop the flow.
These are temporary fixes only. It’s essential to call a professional plumber to perform a permanent repair or replacement.
5. Remove Water and Dry the Affected Area
When a pipe bursts, the aftermath can be overwhelming. Standing water doesn’t just wreak havoc on floors and furniture—it can seep into walls, damage structural elements, and create the perfect breeding ground for mold and mildew. Left unchecked, moisture can compromise your home’s safety, causing long-term problems that are costly to fix. That’s why removing water and thoroughly drying the affected area is absolutely critical.
Proper cleanup isn’t just about grabbing a few towels—it’s a systematic process that ensures your home is safe, dry, and mold-free. Below is a step-by-step guide to tackling water removal effectively and minimizing lasting damage.
Step 1: Remove Standing Water
Start by clearing out as much water as possible from the affected area. The faster you act, the less damage the water can cause. Here’s how to efficiently remove standing water:
- Towels and Mops: Use absorbent towels or rags to soak up smaller puddles. For larger areas, a mop works well to quickly move water off floors.
- Wet/Dry Vacuum: A wet/dry shop vacuum is your best friend when dealing with excess water. Unlike a regular vacuum, it’s designed to safely suck up water from carpets, floors, and even hard-to-reach corners. Be sure to empty the tank regularly as you work.
- Buckets and Brooms: For significant flooding, use buckets to scoop up water and push it toward a central collection point with a broom.
Pro Tip: Work from the edges of the room inward, directing water toward drains if possible. This method reduces the chance of water spreading further into unaffected areas.
Step 2: Accelerate the Drying Process
After standing water is removed, the area will still hold significant moisture that isn’t visible to the naked eye. Accelerating the drying process is key to preventing mold growth and lingering damage.
Here’s how to dry the area thoroughly:
- Fans and Air Circulation: Place several fans in the affected area and keep them running continuously. Box fans and oscillating fans work well to circulate air and speed up evaporation. Position the fans to point directly at the wet surfaces.
- Dehumidifiers: A dehumidifier is essential for pulling moisture from the air, which helps dry out walls, flooring, and furniture more efficiently. For best results, keep windows and doors closed while the dehumidifier is running to trap dry air in the room.
- Ventilation: Open windows and doors where possible to allow fresh air in and humid air out. If the weather is sunny and dry, ventilation will speed up the process significantly.
Pro Tip: Check carpets, rugs, and upholstery for hidden moisture. These items can hold water deep within their fibers, making them prime spots for mold. If carpets are heavily soaked, consider professional cleaning or removal.
Step 3: Inspect and Disinfect the Area
Water from a burst pipe can carry bacteria, especially if the leak occurred in a bathroom or near plumbing connected to wastewater. Even clean water left standing can quickly become contaminated, so disinfecting the area is critical.
Here’s what to do:
- Use a mild disinfectant solution or a mixture of bleach and water (1 cup of bleach per gallon of water) to wipe down all affected surfaces, including floors, walls, and baseboards.
- Pay special attention to crevices and hard-to-reach areas where water may have pooled, such as beneath cabinets or inside closets.
- For wooden floors, dry thoroughly and clean with a specialized wood-safe disinfectant to prevent warping and bacterial growth.
Step 4: Address Severe Damage
If the water damage is extensive—covering large areas of flooring, drywall, or furniture—it’s time to consider calling in the professionals. A certified water damage restoration service has the tools and expertise to:
- Use industrial-grade fans, air movers, and dehumidifiers to ensure complete drying.
- Inspect hidden areas for moisture using thermal cameras or moisture meters.
- Safely remove and replace damaged materials, such as drywall, insulation, and carpet.
- Disinfect the area thoroughly to eliminate any risk of mold or bacterial growth.
Professional intervention ensures your home is returned to a safe, livable condition without hidden moisture causing problems later.
Why Removing Water Properly Is Essential
Ignoring standing water or incomplete drying can lead to major long-term problems, including:
- Structural Damage: Moisture weakens wood, drywall, and other materials, leading to warping, rot, and potential collapse.
- Mold Growth: Mold thrives in damp environments and can spread quickly, posing health risks such as respiratory issues and allergies.
- Electrical Hazards: Water near outlets, wiring, or appliances creates a risk of electrocution or fire. Always ensure electricity is turned off in water-affected areas.
By acting quickly and following the steps above, you can mitigate the impact of a burst pipe and protect your home from further damage. and structural issues.
6. Call a Professional Plumber
While temporary fixes buy time, a burst pipe requires professional attention. At Kingdom Based Plumbing, our team of experts will:
- Assess the damage and locate hidden leaks.
- Replace or repair the damaged section of piping.
- Inspect the rest of your plumbing system to identify any weak points.
In some cases, especially with older homes, a burst pipe may be a sign that your entire plumbing system needs an upgrade to prevent future problems.
Why Choose Us for Burst Pipe Repairs?
We’re local to Northeast Florida, which means we understand the specific plumbing challenges faced by homes in Jacksonville, St. Augustine, and surrounding areas. Plus, our team is available for emergency plumbing services when you need us most.
7. Prevent Future Pipe Bursts
Once the immediate crisis is over, it’s time to focus on prevention. Taking proactive measures can save you stress, money, and future headaches.
Tips to Prevent Pipe Bursting:
- Insulate Exposed Pipes: Wrap pipes in unheated areas (like attics, crawl spaces, and garages) with pipe insulation to prevent freezing.
- Monitor Water Pressure: High water pressure can weaken pipes. Install a pressure regulator if needed.
- Fix Small Leaks Early: A tiny drip today could lead to a burst tomorrow. Address leaks immediately.
- Upgrade Old Pipes: Galvanized and copper pipes corrode over time. Consider repiping with modern, durable materials like PEX.
- Regular Plumbing Inspections: Schedule routine inspections to identify weak spots before they fail.
Frequently Asked Questions (FAQs)
1. How do you know if a pipe burst?
Several signs indicate a burst pipe:
- Sudden drop in water pressure.
- Unexplained water puddles or damp spots on floors, ceilings, or walls.
- Hissing or dripping sounds behind walls.
- Discolored water from taps, indicating rust or debris.
- Higher water bills, as water leaks out unnoticed.
If you suspect a pipe burst, shut off your water immediately and call a plumber.
2. What should you do if a pipe bursts?
Here’s a quick checklist:
- Turn off the main water supply to stop the flow.
- Drain the remaining water from your pipes.
- Locate the burst pipe and apply a temporary fix if possible.
- Remove standing water and start drying the area to prevent mold.
- Call a professional plumber to repair or replace the damaged pipe.
Acting quickly is crucial to minimize damage.
3. How do you know if a pipe burst in an apartment bathroom?
If you live in an apartment and suspect a burst pipe:
- Check for water pooling around the bathroom floor, walls, or ceiling.
- Listen for dripping or hissing sounds.
- Look for bulging paint or water stains on nearby walls or ceilings.
Notify your building manager immediately so they can shut off water to the affected area and call a plumber.
Conclusion
A burst pipe can feel overwhelming, but knowing what steps to take can save your home from severe water damage. At Kingdom Based Plumbing, we’re always here to help Northeast Florida residents tackle plumbing emergencies head-on.
If you’re dealing with a burst pipe or want to prevent one in the future, don’t hesitate to contact us. We’re your trusted, local plumbing professionals in Jacksonville, St. Augustine, and beyond—ready to keep your home safe, dry, and stress-free.
Need emergency plumbing help? Call Kingdom Based Plumbing today for fast, reliable service!


