Summer in North East Florida is a time for fun in the sun, but it can also bring a host of plumbing issues. The combination of higher temperatures, increased water usage, and outdoor activities can strain your plumbing system. This comprehensive guide will provide you with essential summer plumbing tips to maintain your plumbing system, prevent common summer plumbing issues, and keep everything running smoothly.
Understanding Summer Plumbing Issues
Increased Water Usage
During the summer, water usage tends to spike. Kids are home from school, and there’s more need for showers, laundry, and outdoor water activities. This increased demand can strain your plumbing system, leading to issues such as slow drains, leaks, and higher water bills.
Heat and Humidity
The hot and humid climate of North East Florida can affect your plumbing. High temperatures can cause pipes to expand and contract, potentially leading to cracks and leaks. Additionally, humidity can contribute to mold and mildew growth, which can affect your plumbing fixtures and overall health.
Essential Summer Plumbing Tips
Tip 1: Regularly Inspect and Clean Your Drains
Clogged drains are a prevalent summer plumbing issue, primarily due to the increased usage that comes with the season. With more family members at home, kids playing outside, and frequent showers, your plumbing system works overtime. To avoid the inconvenience of slow or blocked drains, it’s crucial to implement regular maintenance practices. Here’s a comprehensive guide to keeping your drains clean and efficient.
Regular Cleaning: A Simple Yet Effective Solution
One of the simplest and most effective methods for maintaining your drains is regular cleaning using household ingredients. A mixture of baking soda and vinegar can work wonders for keeping your drains clear. Here’s how you can do it:
- Preparation: Gather your ingredients—baking soda and vinegar. You’ll need about half a cup of each.
- Application: Pour half a cup of baking soda down the drain first. Follow this with half a cup of vinegar. The mixture will start to fizz, which is a sign that it’s working to break down any buildup.
- Wait: Allow the mixture to sit in the drain for at least 30 minutes. This gives it time to dissolve grease, hair, soap scum, and other debris.
- Flush: After 30 minutes, flush the drain with hot water. Boil a kettle of water and carefully pour it down the drain to wash away any remaining residue.
This natural cleaning method not only helps maintain smooth water flow but also reduces the risk of harsh chemical damage to your pipes. For best results, perform this cleaning routine once a month, especially during the summer when drain usage is at its peak.
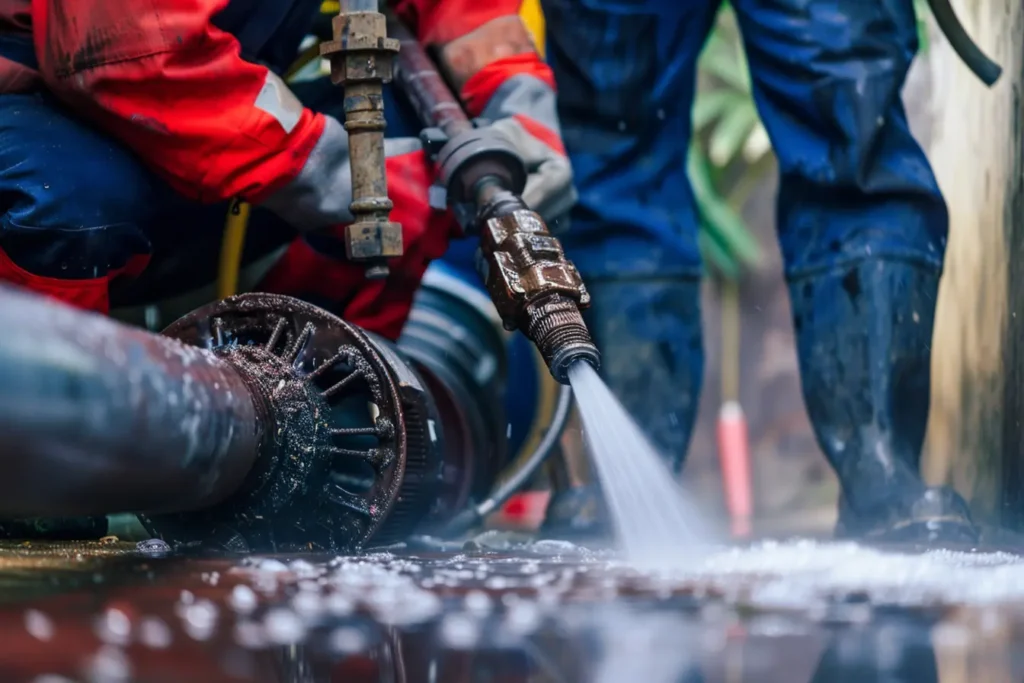
Professional Cleaning: Tackling Stubborn Clogs
While regular cleaning can handle everyday buildup, some clogs are more persistent and require professional intervention. For these tougher blockages, hydro jetting is a highly effective solution. Hydro jetting involves using a high-pressure stream of water to thoroughly clean the inside of your pipes. Here’s a closer look at the process and its benefits:
- Assessment: A professional plumber will first assess the condition of your drains using a specialized camera. This inspection helps identify the location and severity of the clog.
- Hydro Jetting: Once the problem area is identified, the plumber uses a hydro jet—a device that blasts water at high pressure through the pipes. The powerful stream dislodges and flushes out any blockages, including grease, mineral buildup, and debris.
- Benefits: Hydro jetting not only clears existing clogs but also cleans the entire pipe, preventing future blockages. It’s a thorough and long-lasting solution, ensuring your drains remain clear and efficient.
Prevention Tips: Keeping Your Drains Clear
In addition to regular and professional cleaning, adopting some preventive measures can help keep your drains in top condition:
- Use Drain Covers: Install drain covers in your sinks and showers to catch hair, food particles, and other debris. This simple step can significantly reduce the amount of buildup in your drains.
- Avoid Pouring Grease Down the Drain: Grease can solidify and cause blockages. Dispose of cooking oil and grease in a container and throw it in the trash instead.
- Mind What Goes Down the Drain: Be cautious about what you wash down the sink. Avoid putting coffee grounds, eggshells, and fibrous foods down the kitchen drain, and only flush toilet paper and human waste down the toilet.
By integrating these practices into your routine, you can effectively maintain your plumbing system during the summer and avoid the hassle of unexpected clogs.
Tip 2: Monitor Your Water Usage
Monitoring your water usage is a crucial step in maintaining your plumbing system, especially during the summer months when usage tends to spike. By keeping a close eye on your water consumption, you can detect leaks early, prevent high water bills, and ensure your plumbing system runs efficiently. Here’s an in-depth guide on how to effectively monitor your water usage.
Water Bill Monitoring: Detecting Anomalies
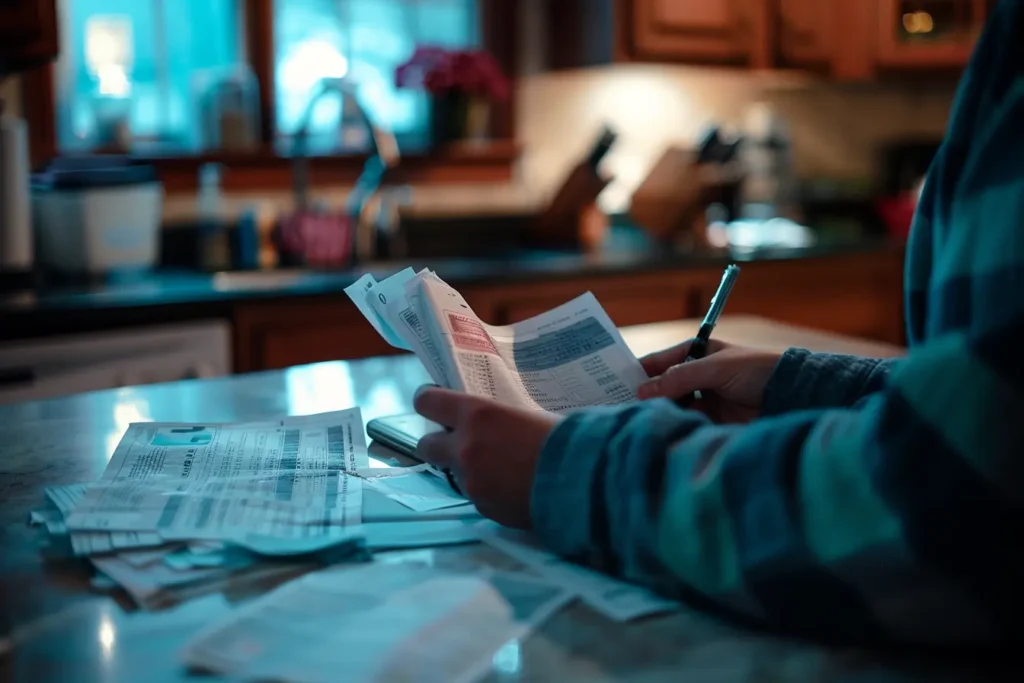
One of the easiest ways to monitor your water usage is by regularly checking your water bill. Here’s how to do it effectively:
- Monthly Comparison: Compare your current water bill with those from previous months. Look for any significant increases that cannot be explained by changes in usage patterns. For instance, if your bill is significantly higher despite consistent usage, this could indicate a leak.
- Usage Trends: Pay attention to the usage trends indicated on your bill. Many water companies provide a graph or a detailed breakdown of your usage over time. An unexplained spike in usage can be a red flag.
- Average Consumption: Understand the average water consumption for a household of your size. This information can be found on many water utility websites. If your usage is consistently above average, it might be time to investigate further.
Leak Detection: Identifying Problem Areas
Detecting leaks early can save you from costly repairs and high water bills. Here are detailed steps to identify potential leaks in and around your home:
- Indoor Inspections:
- Damp Spots: Regularly inspect your walls, ceilings, and floors for damp spots. These can indicate hidden leaks in your plumbing system.
- Mold and Mildew: The presence of mold or mildew is a strong indicator of moisture, which often results from leaks. Pay attention to any musty odors as well.
- Appliance Checks: Check around appliances like dishwashers, washing machines, and refrigerators with water lines. Look for any signs of water damage or leaks.
- Outdoor Inspections:
- Green Patches: Unusually green patches of grass in your yard can indicate an underground leak in your irrigation system or water lines. These areas tend to be greener due to the extra water.
- Soggy Spots: Check for consistently wet or soggy spots in your yard, even during dry weather. These can be signs of underground leaks.
- Sprinkler System: Inspect your sprinkler system for leaks. Check each sprinkler head for proper functioning and look for pooling water around the heads.
Tools and Techniques for Monitoring
In addition to manual inspections, several tools and techniques can help you monitor your water usage more effectively:
- Water Meter Check: Conduct a simple water meter test to check for leaks:
- Initial Reading: Turn off all water sources in your home and take an initial reading from your water meter.
- Wait: Wait for about 2 hours without using any water.
- Final Reading: Take a final reading from your water meter. If the reading has changed, it indicates a leak.
- Smart Water Monitors: Invest in smart water monitors that attach to your water line and provide real-time data on your water usage. These devices can alert you to unusual usage patterns and potential leaks, helping you take immediate action.
- Professional Inspections: Schedule regular professional inspections. Plumbers can use advanced tools like thermal imaging and acoustic sensors to detect hidden leaks that are not visible during a manual inspection.
Prevention Tips: Proactive Measures
Proactively monitoring your water usage and taking preventive measures can save you from unexpected plumbing issues:
- Install Water-Saving Fixtures: Consider installing water-saving fixtures like low-flow showerheads and faucets. These fixtures reduce water usage without compromising performance.
- Regular Maintenance: Perform regular maintenance on your plumbing system, including inspecting and servicing water heaters, pipes, and irrigation systems.
- Educate Household Members: Educate everyone in your household about the importance of monitoring water usage and the signs of potential leaks. This collective effort can help detect issues early.
By diligently monitoring your water usage and taking proactive measures, you can maintain an efficient plumbing system, reduce water wastage, and avoid the inconvenience of unexpected repairs.
Tip 3: Service Your Water Heater
Your water heater is an unsung hero in your home, especially during the summer months when household activities surge. From more frequent showers to increased laundry loads, your water heater works tirelessly to meet the heightened demand. To ensure it operates efficiently and has a long lifespan, regular servicing is crucial. Here’s an in-depth guide to maintaining your water heater during the summer.
Flushing the Tank: Removing Sediment Buildup
One of the most critical maintenance tasks for your water heater is flushing the tank. Over time, sediment and mineral deposits accumulate at the bottom of the tank. This buildup can reduce the efficiency of your water heater, increase energy consumption, and shorten its lifespan. Here’s a detailed process to flush your water heater tank:
- Turn Off the Heater: Before you begin, turn off the water heater. For electric heaters, switch off the breaker. For gas heaters, set the thermostat to the pilot setting.
- Shut Off the Water Supply: Turn off the cold water supply valve to prevent more water from entering the tank during the flushing process.
- Connect a Hose: Attach a garden hose to the drain valve located at the bottom of the tank. Ensure the other end of the hose is placed in a suitable drainage area, such as a floor drain or an outdoor space.
- Drain the Tank: Open the drain valve to allow water to flow out of the tank. Be cautious, as the water may be hot. Opening a hot water faucet in your home can help release pressure and speed up the draining process.
- Flush with Cold Water: Once the tank is empty, briefly turn on the cold water supply to flush out any remaining sediment. Let the water run until it flows clear.
- Close the Valve and Refill: Close the drain valve, remove the hose, and turn on the cold water supply to refill the tank. Once the tank is full, turn the water heater back on.
Performing this task at least once a year, and more frequently if you have hard water, helps maintain the efficiency of your water heater and ensures it runs smoothly.
Temperature Settings: Optimizing for Safety and Efficiency
Properly setting the temperature on your water heater is another key aspect of maintenance. The recommended setting is 120°F (49°C), which balances safety and energy efficiency. Here’s why this setting is important:
- Preventing Scalding: Water temperatures above 120°F can cause scalding injuries, especially in young children and the elderly. Setting your water heater to 120°F ensures the water is hot enough for everyday use without posing a burn risk.
- Energy Savings: Lowering the temperature reduces the energy required to heat the water, resulting in cost savings on your utility bills. Every 10°F reduction can save up to 5% on your energy costs.
- Extending Heater Lifespan: High temperatures can accelerate the wear and tear on your water heater, leading to a shorter lifespan. By maintaining a moderate temperature, you can extend the life of your appliance.
To adjust the temperature, follow these steps:
- Locate the Thermostat: Most water heaters have a thermostat dial located on the unit. For electric heaters, there may be two thermostats (one for each heating element).
- Adjust the Setting: Turn the dial to 120°F. If your water heater has two thermostats, adjust both to the same setting to ensure consistent water temperature.
- Test the Water: After adjusting the temperature, wait a few hours and then test the hot water at a faucet. Use a thermometer to verify the temperature is at the desired setting.
Regular Inspections: Proactive Maintenance
In addition to flushing the tank and adjusting the temperature, regular inspections are vital for maintaining your water heater. Here are some tips for conducting a thorough inspection:
- Check for Leaks: Inspect the area around your water heater for any signs of water leaks, such as puddles or dampness. Leaks can indicate issues with the tank or connections.
- Inspect the Anode Rod: The anode rod helps prevent corrosion inside the tank. Check it annually and replace it if it’s significantly corroded.
- Listen for Noises: Unusual noises, like popping or rumbling, can indicate sediment buildup. If you hear these sounds, it’s time to flush the tank.
By regularly servicing your water heater, you can ensure it operates efficiently, provides reliable hot water, and avoids unexpected breakdowns during the busy summer months.
Tip 4: Maintain Your Sprinkler System
A well-maintained sprinkler system is essential for keeping your lawn and garden lush and green during the hot summer months. Efficient watering not only helps your plants thrive but also conserves water and prevents potential damage to your plumbing system. Regular maintenance and inspections are key to ensuring your sprinkler system operates effectively. Here’s a detailed guide to maintaining your sprinkler system.
Inspect Sprinkler Heads: Ensuring Even Coverage
Sprinkler heads are the most visible and often the most vulnerable parts of your irrigation system. Over time, they can become damaged or misaligned, leading to uneven watering and water waste. Regular inspections can help you identify and address these issues promptly:
- Visual Inspection: Walk around your lawn and garden and visually inspect each sprinkler head. Look for any that are broken, cracked, or missing parts. Misaligned heads can also cause uneven watering, so ensure they are pointing in the right direction.
- Test the System: Turn on your sprinkler system and observe the water distribution. Check for areas that are receiving too much or too little water. Adjust the sprinkler heads as needed to ensure even coverage across your lawn and garden.
- Replace or Repair: If you find any damaged sprinkler heads, replace them immediately. For minor issues, such as a clogged nozzle, you can clean and repair the head. Regular maintenance kits are available at most home improvement stores, providing the necessary tools and parts for common repairs.
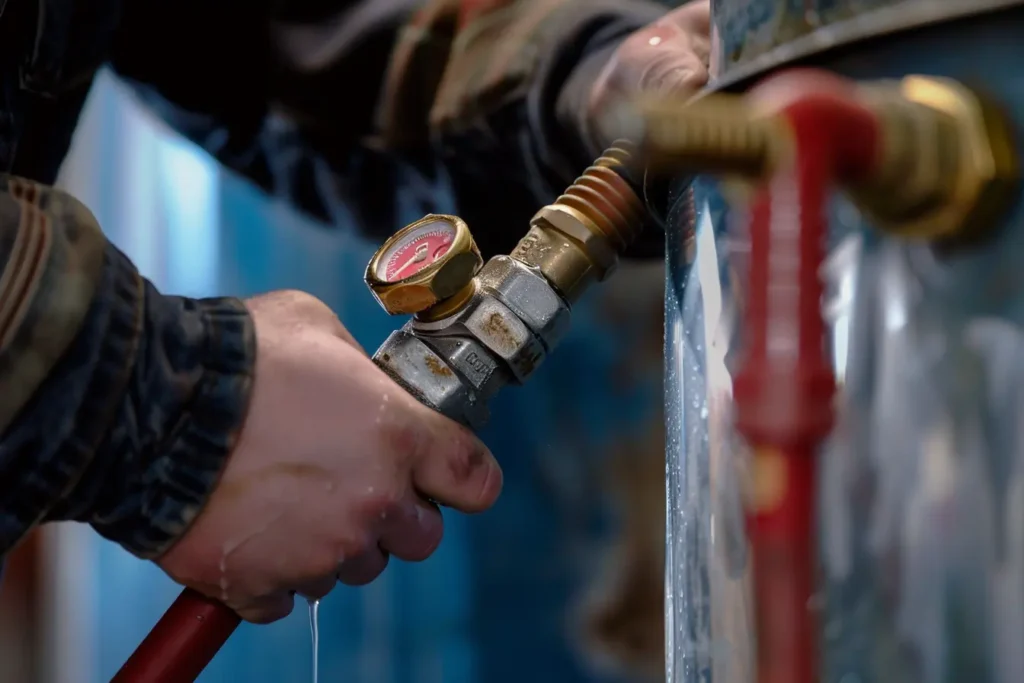
Check for Leaks: Preventing Water Waste
Leaks in your sprinkler system can lead to significant water waste and high water bills. They can occur at various points in the system, including the connections, valves, and underground pipes. Here’s how to thoroughly check for leaks:
- Inspect Connections and Valves: Start by inspecting the connections and valves in your sprinkler system. Look for any signs of moisture, puddles, or water spraying from the connections. Tighten loose connections and replace any faulty valves to prevent leaks.
- Underground Leaks: Detecting underground leaks can be more challenging. Look for unusually wet or soggy areas in your lawn, which can indicate a leak below the surface. Another sign of an underground leak is a section of your lawn that is greener and more vigorous than the surrounding areas.
- Pressure Test: Conduct a pressure test on your sprinkler system. Turn off all water outlets and observe the water meter. If the meter continues to move, it suggests a leak somewhere in the system. Isolate sections of your sprinkler system to identify the leak’s location and address it promptly.
Seasonal Adjustments: Adapting to Weather Changes
During the summer, it’s important to adjust your sprinkler system to accommodate the hotter and drier weather. This ensures your lawn and garden receive adequate water without overwatering. Here are some tips for seasonal adjustments:
- Watering Schedule: Adjust your watering schedule to the early morning or late evening when temperatures are cooler and evaporation is minimized. This helps the water penetrate the soil more effectively and reduces water waste.
- Duration and Frequency: Increase the duration and frequency of watering sessions during peak summer heat. However, be mindful not to overwater, as this can lead to root rot and other plant health issues. A deep, infrequent watering schedule is typically more beneficial than frequent, shallow watering.
- Rain Sensors: Consider installing rain sensors in your sprinkler system. These sensors automatically shut off the system during rainfall, preventing overwatering and conserving water.
Professional Maintenance: Expert Care for Your System
While regular inspections and DIY maintenance are essential, scheduling professional maintenance for your sprinkler system can ensure it operates at peak efficiency. Professional plumbers and irrigation specialists have the expertise and tools to perform thorough inspections and address any underlying issues. Here’s what to expect from professional maintenance:
- Comprehensive Inspection: A professional will conduct a detailed inspection of your entire sprinkler system, checking for leaks, damaged components, and system efficiency.
- System Tune-Up: Professionals can fine-tune your sprinkler system, adjusting sprinkler heads, repairing leaks, and optimizing the watering schedule to match your lawn’s needs.
- Upgrades and Recommendations: Based on the inspection, the professional may recommend upgrades or improvements to your system, such as installing more efficient sprinkler heads or adding rain sensors.
By regularly maintaining your sprinkler system, you can ensure efficient watering, conserve water, and prevent costly repairs. A well-maintained system will keep your lawn and garden healthy and vibrant throughout the summer.
Common Summer Plumbing Issues and Solutions
Clogged Drains
With more people at home, drains can easily become clogged with hair, soap, and other debris. Regular cleaning and using drain covers can help prevent clogs. For persistent issues, professional hydro jetting can provide a thorough solution.
Leaks
Leaks can develop due to increased water pressure and the expansion and contraction of pipes in the heat. Regular inspections and prompt repairs are essential to prevent water damage and high bills.
Water Heater Overload
Increased use of hot water can strain your water heater. Flushing the tank, checking the temperature settings, and scheduling regular maintenance can keep your water heater running efficiently.
Sprinkler System Problems
Broken or misaligned sprinkler heads can waste water and damage your lawn. Regular inspections and maintenance of your sprinkler system are crucial to avoid these issues.
Real-World Examples
Example 1: The Smith Family’s Slow Drains
The Smith family from St. Augustine experienced slow drains due to increased usage during the summer. They tried home remedies without success and eventually called Kingdom Based Plumbing. We performed hydro jetting to clear the drains, restoring normal flow and preventing future clogs.
Example 2: The Johnsons’ Leaky Irrigation System
The Johnsons in Jacksonville noticed their water bill skyrocketing during the summer. Our team discovered a significant leak in their irrigation system. We repaired the leak, reprogrammed the sprinkler system for optimal usage, and their water bills returned to normal.
Conclusion: Enjoy a Stress-Free Summer
Maintaining your plumbing system during the summer in North East Florida requires regular inspections, prompt repairs, and preventive measures. By following the tips and insights shared in this guide, you can prevent common summer plumbing issues and ensure your system runs smoothly all season long.
Frequently Asked Questions
Q1: Are there more plumbing repairs needed in summer?
Yes, plumbing repairs are often more frequent in the summer due to increased water usage, higher temperatures, and outdoor activities that can strain your plumbing system. Regular maintenance and inspections can help mitigate these issues.
Q2: What are some common summer plumbing issues?
Common summer plumbing issues include clogged drains, leaks, water heater overloads, and sprinkler system problems. Increased usage and environmental factors like heat can exacerbate these problems.
Q3: What plumbing pipes are best for summer?
For summer, PVC (Polyvinyl Chloride) pipes are highly recommended due to their durability and resistance to high temperatures and pressure. Copper pipes are also a good choice, though they can be prone to corrosion in certain conditions. Ensuring your plumbing system is equipped with the right materials can help prevent issues during the hot months.
By understanding these aspects and taking proactive steps, you can maintain a reliable and efficient plumbing system throughout the summer. If you need professional assistance, Kingdom Based Plumbing is here to help with all your summer plumbing needs.


